• Home
  • About

szehau's weblog

Life, Internet, Software, Gadgets, Programming and Investments

  • life log
  • internet
  • programming
  • software
  • working holiday
  • gadget
  • project

Troubleshooting A Flickering LED Downlight

I’m using LED downlights in my home as the main light source. One of them became flickering. After some research on the Internet, most of them will tell you that maybe the LED driver quality is not good and give unstable voltage to the LEDs.

So, I changed the LED driver that I ordered from the China websites. It works but a month later, the same LED downlight flickered again. I changed the LED driver again and it came back working again.

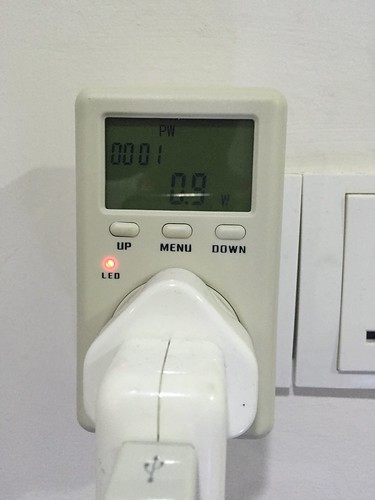
Last week it became flickering again. So I decided to change the LED driver again today. This time it does not work. The LED downlight is still flickering. I measured the voltage and current of the LED driver output and they are good and stable.

So I suspect one of the LED light inside the downlight is not working properly. There are 12 LED connected in series. Since the LED is providing constant current so it is ok to short one of the LED. So I short the LED one by one to test if the downlight will stop flickering without the shorted LED in the circuit.

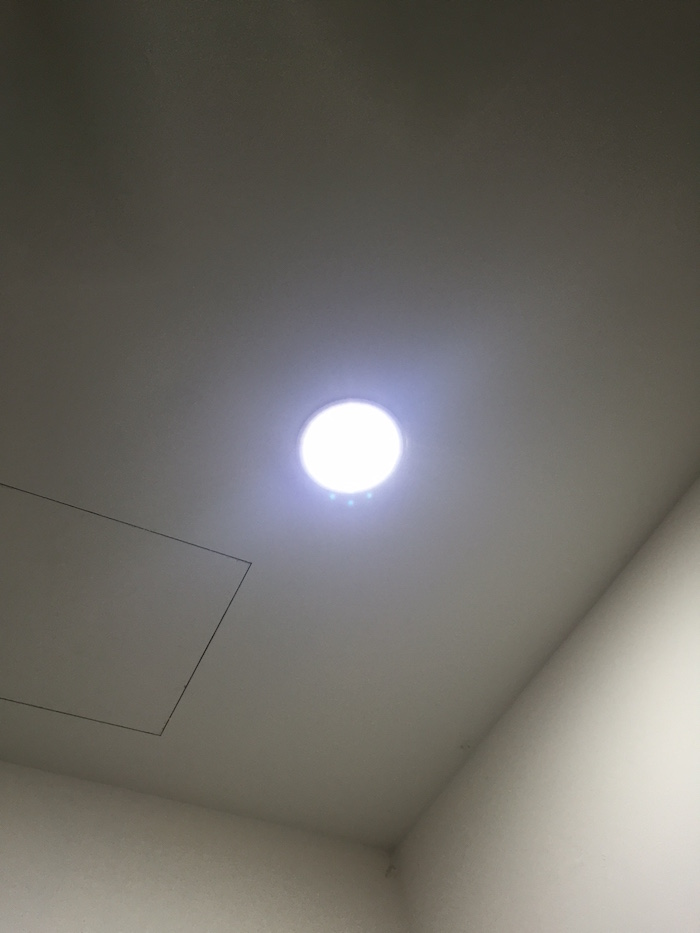
I was right! One of the LED was causing the problem. It was not the LED driver problem! Since I don’t have a spare LED at home, I temporary short the LED legs to prevent it from working. And my LED downlight now working perfectly good!

LED Downlight
LED Downlight

The LED downlight cost was about RM60. The LED is rated at 12W and it has 12 LEDs inside. So each of the LED is rated at 1W. I’m going to replace it with the 1W LED I bought from the China Website for my LED night light project, which only cost me about USD0.04 each. It wastes money if I replace the whole LED downlight with a new one :)

Repair A Broken iPhone Lightning Cable

Have a iPhone lightning cable where its white insulation has been peeled off and the internal wire exposed?

If the cable is still functioning, e.g. you are able to charge your phone and transfer data, do not throw it away. You can save the cable by a simple fix.

Repair A Broken iPhone Lightning Cable

First, you need to find a heat shrink tube that is about the size of the lightning cable connector. It is better to get a heat shrink that shrink more than 50% when it is heated.

Repair A Broken iPhone Lightning Cable

Second, cut the heat shrink tube so that it has the length enough to cover the exposed wire and the connector.

Third, apply some heat using heat gun. I don’t have a heat gun so I use a cigarette lighter. Be careful not to over heat as it will burn your cable. You can also use hair dryer.

Repair A Broken iPhone Lightning Cable

It’s a pretty easy and good looking repair. You can get heat shrink at most of the electronic shops (not the gadget shop). If you stay in KL, you can find electronic shops at Jalan Pasar at Pudu. Alternately, you can buy it online (e.g. Heat Shrink – where I bought mine).

New Gadget – MacBook Pro with Retina Display (2015)

MacBook Pro with Retina Display

Ok. My new gadget is in the house now – MacBook Pro with Retina Display 2015. It replaces my nearly 5 years old’s MacBook Air. My MacBook Air is still working good just that it creates a lot of heat and noise (fan) when running heavy stuffs like IDE and compiling source code.

Always want to replace one and now it is the time. MacBook Pro with Retina Display 2015 has more horse power than the Air, about the same thick & dimension of Air, better display, keyboard with back light (oh I can use it in night) but heavier.

Bought this at EpicCentre and come with some free gifts: sleeve, 8GB USB drive and a keyboard protector.

The pre-installed OS is OS X Yosemite so I need another few hours to update to OS X El Captan (which gave some performance on my old MacBook Air).

Hope this gadget will last for another 5 years before another upgrade :)

One Watt LED Night Light

This is a very simple electronic project. I built this as a night light in my sleeping room.

The reason for building this was, the existing LED night light that I bought from the Mr DIY is a bit dangerous because it needs to be connected to AC power source and my daughter always wants to play with it.

With this LED night light, I can connect it to any mobile phone’s power bank that has a USB port. And it is safe to play with. It doesn’t get hot even it ran for hours!

One Watt LED Night Light

Bill of materials:

  • A one watt LED (RM0.20)- bought it from the China website.
  • A heat sink for LED (RM0.20)- bought it from the China website.
  • A 39 ohm 1 watt resistor (RM0.10) – bought it from an electronic shop at Jalan Pasar, Pudu
  • A LM317 voltage regulator (RM1.50) – bought it from an electronic shop at Jalan Pasar, Pudu
  • A heat sink for LM317 (RM1.00) – bought it from an electronic shop at Jalan Pasar, Pudu
  • A Mamee instant noodle cup – recycle
  • A broken iPad USB cable – recycle
  • Some card board – recycle

Total cost is less than RM4!

1. First, you will need to solder all the component together. You can refer to the circuit suggested in this website: http://www.instructables.com/id/Super-simple-high-power-LED-driver/

One Watt LED Night Light

2. Make a few card boards that cut into the instant noodle cup shape. Make a hole at the middle of one of the card board and put the LED into the middle.

One Watt LED Night Light

3. Pull other electronic components to the back. Put a layer of white paper at the side of LED for better effect. Pull back the electronic components and screw the heat sink and the LM317 together with the card board.

One Watt LED Night Light

4. Use glue (any) to stick the card board to the instant noodle cup and it’s all done.

One Watt LED Night Light

5. I run some test with the watt meter. It’s working at 0.9 to 1w which is within my expectation!

One Watt LED Night Light

I can bring this light to any where because it is portable and safe. Including toilet! if I don’t want to have a very bright light at the mid night when visiting toilet.

So. What’s next? Maybe a solar panel with rechargeable battery to power this little thing? Stay tuned!

Thanks for reading!

Electronics Project – Simple Card Read Keyboard Emulator Using Arduino Pro Micro

I bought this little thing – Micro Pro – from the China website. I think it is a clone or compatible to the SparkFun’s Micro Pro. It is easy to use. It comes with USB that you can use it to program the microcontroller or let the microcontroller to communicate with your computer. You can simply use the Keyboard library from the Arduino to program a keyboard emulator: http://www.arduino.cc/en/Reference/KeyboardPrintln.

Arduino Pro Micro - Simple Card Read Keyboard Emulator

Below is the specification of the microcontroller:

  • ATmega32U4 running at 5V/16MHz
  • Supported under Arduino IDE v1.0.1
  • On-Board micro-USB connector for programming
  • 4 x 10-bit ADC pins
  • 12 x Digital I/Os (5 are PWM capable)
  • Rx and Tx Hardware Serial Connections

Below is the source code for my program that emulates a card reader keyboard:

int button = 2;

void setup() {
  pinMode(button, INPUT_PULLUP); // Use internal pull up resistor
  Keyboard.begin();
}

void loop() {
  int pressed = digitalRead(button) == 0;
  if (pressed) delay(500);
  if (pressed && digitalRead(button) == 0) {
    Keyboard.println("111111");
    delay(2000);
  } else if (pressed) {
    Keyboard.println("222222");
    delay(2000);
  }
}

If you press the button once quickly, the microcontroller will send the card data string “111111” (with new line) to your PC via USB HID keyboard driver.

If you press the button once a little bit longer (around 500 milliseconds), the microcontroller will send the card data string “222222” (with new line) to your PC via USB HID keyboard driver.

I’m using a internal pull up resistor in the microcontroller itself so that I do not need to have a external resistor to pull up or down the floating digital pin (when used as input). When the input pin is pull down (when the switch is pressed) to the ground, the digitalRead will return zero value and otherwise it will be value one.

It’s so simple that you can make your program ready within minutes. Of course, you must first make sure the programming environment (IDE, the COM port of the Micro Pro is properly installed) is ready.

Next Page »

Email News Letter

Sign up to receive updates daily and to hear what's going on with us

More Posts

5 Essential Things You Need To Have At Your Home During The COVID-19 Pandemic

June 1, 2021 22:15 By Sze Hau

McDonald’s Gift Voucher From Line

November 18, 2014 19:48 By Sze Hau

Electronics Project – Raspberry Pi + Attiny85 + LCD 1620

July 28, 2014 16:57 By Sze Hau

Blog Network

  • Personal Fincance Personal Finance – Personal Money Tips, Stock Investment, Small Business and Make Money Online
  • Snippet IT Information technology news, ideas and experiences and opinions

Recent

  • 5 Essential Things You Need To Have At Your Home During The COVID-19 Pandemic
  • Troubleshooting A Flickering LED Downlight
  • Repair A Broken iPhone Lightning Cable
  • New Gadget – MacBook Pro with Retina Display (2015)
  • One Watt LED Night Light

Search

Tags

2014 adsense advertisement Arduino baby blog blogtal Canon EOS 400D Chinese New Year Christchurch CNY DiGi DIY electronic FBM Flickr Flickr Uploadr Google Google Maps Google Search Results Google Webmaster Central investment joke KLCI KLSE Lake Tekapo LED MacBook Air Maybank2u Motueka movie mutual funds New Zealand PC Fair 2009 Queenstown restaurant for dinner sharing stock trackback Twitter unit trust visa wordpress wordpress plugin working holiday