• Home
  • About

szehau's weblog

Life, Internet, Software, Gadgets, Programming and Investments

  • life log
  • internet
  • programming
  • software
  • working holiday
  • gadget
  • project

Repair A Broken iPhone Lightning Cable

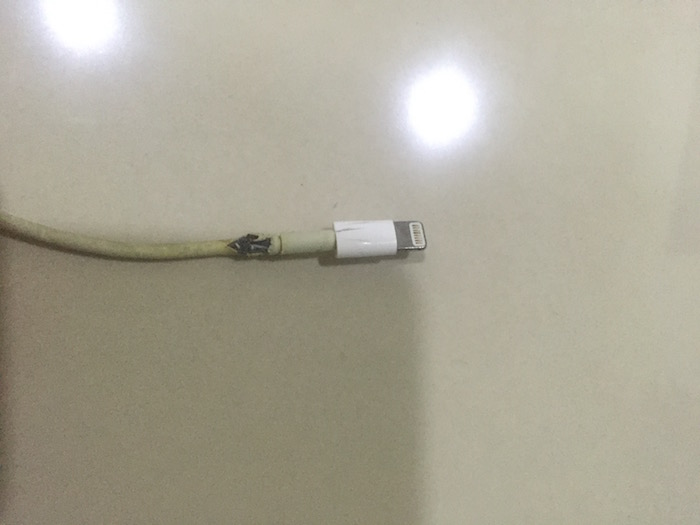
Have a iPhone lightning cable where its white insulation has been peeled off and the internal wire exposed?

If the cable is still functioning, e.g. you are able to charge your phone and transfer data, do not throw it away. You can save the cable by a simple fix.

Repair A Broken iPhone Lightning Cable

First, you need to find a heat shrink tube that is about the size of the lightning cable connector. It is better to get a heat shrink that shrink more than 50% when it is heated.

Repair A Broken iPhone Lightning Cable

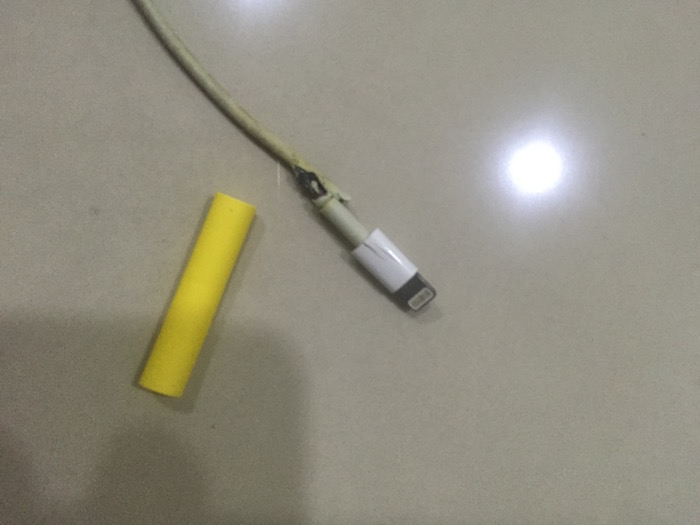
Second, cut the heat shrink tube so that it has the length enough to cover the exposed wire and the connector.

Third, apply some heat using heat gun. I don’t have a heat gun so I use a cigarette lighter. Be careful not to over heat as it will burn your cable. You can also use hair dryer.

Repair A Broken iPhone Lightning Cable

It’s a pretty easy and good looking repair. You can get heat shrink at most of the electronic shops (not the gadget shop). If you stay in KL, you can find electronic shops at Jalan Pasar at Pudu. Alternately, you can buy it online (e.g. Heat Shrink – where I bought mine).

One Watt LED Night Light

This is a very simple electronic project. I built this as a night light in my sleeping room.

The reason for building this was, the existing LED night light that I bought from the Mr DIY is a bit dangerous because it needs to be connected to AC power source and my daughter always wants to play with it.

With this LED night light, I can connect it to any mobile phone’s power bank that has a USB port. And it is safe to play with. It doesn’t get hot even it ran for hours!

One Watt LED Night Light

Bill of materials:

  • A one watt LED (RM0.20)- bought it from the China website.
  • A heat sink for LED (RM0.20)- bought it from the China website.
  • A 39 ohm 1 watt resistor (RM0.10) – bought it from an electronic shop at Jalan Pasar, Pudu
  • A LM317 voltage regulator (RM1.50) – bought it from an electronic shop at Jalan Pasar, Pudu
  • A heat sink for LM317 (RM1.00) – bought it from an electronic shop at Jalan Pasar, Pudu
  • A Mamee instant noodle cup – recycle
  • A broken iPad USB cable – recycle
  • Some card board – recycle

Total cost is less than RM4!

1. First, you will need to solder all the component together. You can refer to the circuit suggested in this website: http://www.instructables.com/id/Super-simple-high-power-LED-driver/

One Watt LED Night Light

2. Make a few card boards that cut into the instant noodle cup shape. Make a hole at the middle of one of the card board and put the LED into the middle.

One Watt LED Night Light

3. Pull other electronic components to the back. Put a layer of white paper at the side of LED for better effect. Pull back the electronic components and screw the heat sink and the LM317 together with the card board.

One Watt LED Night Light

4. Use glue (any) to stick the card board to the instant noodle cup and it’s all done.

One Watt LED Night Light

5. I run some test with the watt meter. It’s working at 0.9 to 1w which is within my expectation!

One Watt LED Night Light

I can bring this light to any where because it is portable and safe. Including toilet! if I don’t want to have a very bright light at the mid night when visiting toilet.

So. What’s next? Maybe a solar panel with rechargeable battery to power this little thing? Stay tuned!

Thanks for reading!

Electronics Project – Simple Card Read Keyboard Emulator Using Arduino Pro Micro

I bought this little thing – Micro Pro – from the China website. I think it is a clone or compatible to the SparkFun’s Micro Pro. It is easy to use. It comes with USB that you can use it to program the microcontroller or let the microcontroller to communicate with your computer. You can simply use the Keyboard library from the Arduino to program a keyboard emulator: http://www.arduino.cc/en/Reference/KeyboardPrintln.

Arduino Pro Micro - Simple Card Read Keyboard Emulator

Below is the specification of the microcontroller:

  • ATmega32U4 running at 5V/16MHz
  • Supported under Arduino IDE v1.0.1
  • On-Board micro-USB connector for programming
  • 4 x 10-bit ADC pins
  • 12 x Digital I/Os (5 are PWM capable)
  • Rx and Tx Hardware Serial Connections

Below is the source code for my program that emulates a card reader keyboard:

int button = 2;

void setup() {
  pinMode(button, INPUT_PULLUP); // Use internal pull up resistor
  Keyboard.begin();
}

void loop() {
  int pressed = digitalRead(button) == 0;
  if (pressed) delay(500);
  if (pressed && digitalRead(button) == 0) {
    Keyboard.println("111111");
    delay(2000);
  } else if (pressed) {
    Keyboard.println("222222");
    delay(2000);
  }
}

If you press the button once quickly, the microcontroller will send the card data string “111111” (with new line) to your PC via USB HID keyboard driver.

If you press the button once a little bit longer (around 500 milliseconds), the microcontroller will send the card data string “222222” (with new line) to your PC via USB HID keyboard driver.

I’m using a internal pull up resistor in the microcontroller itself so that I do not need to have a external resistor to pull up or down the floating digital pin (when used as input). When the input pin is pull down (when the switch is pressed) to the ground, the digitalRead will return zero value and otherwise it will be value one.

It’s so simple that you can make your program ready within minutes. Of course, you must first make sure the programming environment (IDE, the COM port of the Micro Pro is properly installed) is ready.

Electronics Project – Raspberry Pi + Attiny85 + LCD 1620

I always want to start an electronic project that build a home automation system but I don’t have much time. Don’t have time is just a bad excuse. So to make thing starts, I start buying electronic components and devices that I need and trying them one by one.

[Read more…]

New SSD Cloud Hosting @DigitalOcean

I have recently moved all my websites to another VPS hosting. The previous dedicated server was too expensive to me to continue as I didn’t earn much from the websites’ income. The previous hosting was USD$119 per month and the one at DigitalOcean is only USD$10 per month.

I’m having good experience with DigitalOcean hosting. To deploy a VPS (they call it droplet) is blazing fast and very easy. Within a minute, with a few clicks, your VPS with the Linux distribution you have chosen is ready to use.

DigitalOcean hosting plans are very affordable. For as low as USD$5, you can get a 1 core CPU, 512 RAM, 20GB SSD disk space and 1TB transfer. You mange your droplet on the cloud. You can create and destroy VPS using their very user-friendly cloud hosting interface at anytime you want.

Since DigitalOcean uses SSD in all the hosting plan, deploy a Linux image on the disk is as fast as to deploy them in the RAM. You can experiment with you Linux setup you want with very low cost and destroy & recreate if you not satisfy with current setup.

Every droplet you have created is a VPS (Virtual Private Server) with a dedicated IP address. You will have the root access to everything and the server is unmanaged. You are the administrator of the VPS. Anyway, if you encounter a problem and cannot be resolved by yourself, you can always get support from DigitalOcean by creating a ticket or get help from the community.

Setting up a VPS for multi domains is fun and can be challenging. Since the VPS is unmanaged, I need to setup almost every thing from nothing. But I have successfully setup the web & email server using Virtualmin (at zero cost!) and migrated most of my websites. I will share my setup steps when I have time and the problem I was facing during the setup and how I solve it.

So far I’m very satisfy with DigitalOcean for the pricing, server speed, user-friendly droplet management interface and the service uptime.

If you are interested to get one, you can always register a free account, open a ticket and ask for promotional code. You may be able to get a promotion code that let you start to play with the VPS for free :)

Next Page »

Email News Letter

Sign up to receive updates daily and to hear what's going on with us

More Posts

5 Essential Things You Need To Have At Your Home During The COVID-19 Pandemic

June 1, 2021 22:15 By Sze Hau

LED Downlight

Troubleshooting A Flickering LED Downlight

February 13, 2016 00:29 By Sze Hau

MacBook Pro with Retina Display

New Gadget – MacBook Pro with Retina Display (2015)

November 13, 2015 00:27 By Sze Hau

Blog Network

  • Personal Fincance Personal Finance – Personal Money Tips, Stock Investment, Small Business and Make Money Online
  • Snippet IT Information technology news, ideas and experiences and opinions

Recent

  • 5 Essential Things You Need To Have At Your Home During The COVID-19 Pandemic
  • Troubleshooting A Flickering LED Downlight
  • Repair A Broken iPhone Lightning Cable
  • New Gadget – MacBook Pro with Retina Display (2015)
  • One Watt LED Night Light

Search

Tags

2014 adsense advertisement Arduino baby blog blogtal Canon EOS 400D Chinese New Year Christchurch CNY DiGi DIY electronic FBM Flickr Flickr Uploadr Google Google Maps Google Search Results Google Webmaster Central investment joke KLCI KLSE Lake Tekapo LED MacBook Air Maybank2u Motueka movie mutual funds New Zealand PC Fair 2009 Queenstown restaurant for dinner sharing stock trackback Twitter unit trust visa wordpress wordpress plugin working holiday